Content
How to integrate subscriptions in your iOS app using Glassfy and Swift.
Subscriptions are one of the most successful business models to monetize apps. While we covered the benefits of in-app subscriptions in another article, if you need to integrate monetization from scratch or you are looking to improve your subscription infrastructure, this article is exactly what you should read next. With this article, we want to help you integrate subscriptions and start monetizing your iOS app using Swift and Glassfy. You can do it just in a few minutes, and you will save weeks of dev time and lots of headaches compared to using StoreKit and doing everything by yourself.
In this article you will learn to:
- Configure the App Store
- Configure SKUs, Offering, and Permissions
- Add Glassfy’s SDK to your application
1. Configure the App Store
The first step is to configure your app into Glassfy–that is quick and straightforward. Indeed, Glassfy needs your app’s bundle ID and the App Store Shared Secret to connect to Apple on your behalf and verify receipts.
On your App Store Connet page, go to the Manage page in the section In-App Purchases. Click the App-Specific Shared Secret link, and you’ll be able to see or create a new shared secret.
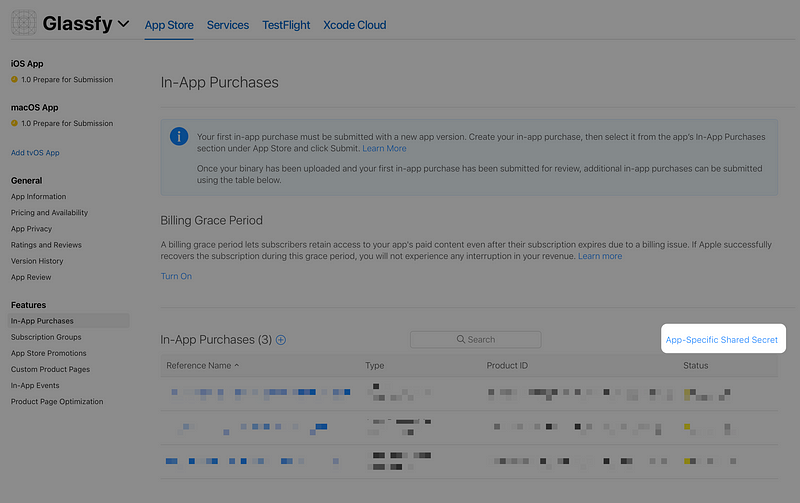
Just copy it, and paste it into the Glassfy Dashboard.
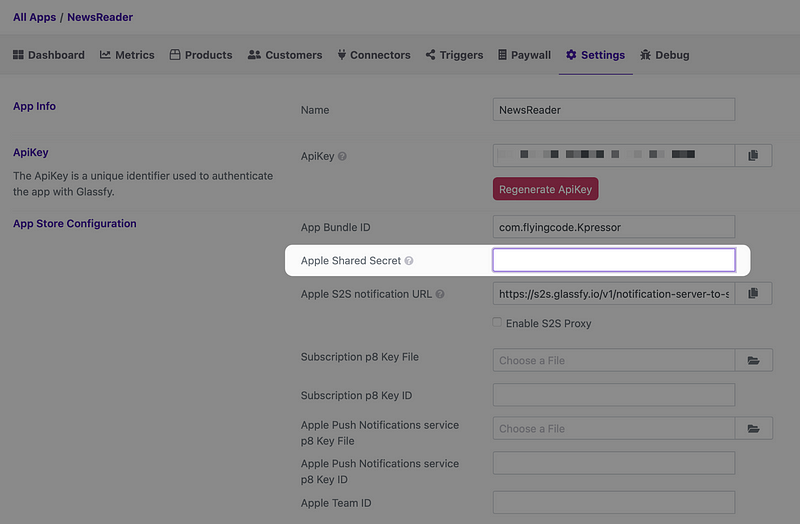
We also recomend to set the “Server To Server” notification by following the instructions in this guide.
2. Configure SKUs, Offering, and Permissions
Next, you have to create and configure your in-app subscriptions and any other in-app purchases you plan to have in App Store Connect. Be sure to have all the App Store Contracts signed and all in-app purchases in the “Ready To Review” status.
We recomend to use the following scheme for naming the app store products:
eg:
ios_newsreader_premium_xmasspecial_weekly_1.99_7days_0
ios_newsreader_premium_montly_3.99_7days_0
ios_newsreader_premium_annual_39.99_7days_0
You should now create the SKUs in the Glassfy Dashboard: at the “Product Page” click on Create SKU and add create the SKU by using the products created on App Store Connect.
And use the same name schema for the SKU ID by omitting the platform at the beginning of the name:
newsreader_premium_xmasspecial_weekly_1.99_7days_0
newsreader_premium_montly_3.99_7days_0
newsreader_premium_annual_39.99_7days_0
Now create an Offering to present to the user. Click on Create Offering and create a permission named:
premium_offering
including this two SKUs:
newsreader_premium_montly_3.99_7days_0
newsreader_premium_annual_39.99_7days_0
Next and final step in Glassfy Dashboard will be to create a Permission that will contains both SKUs: click on Create Permission and create a permission named:
premium_permission
and include the two SKUs:
newsreader_premium_montly_3.99_7days_0
newsreader_premium_annual_39.99_7days_0
3. Add Glassfy’s SDK to your application
Open XCODE and add Glassfy using Swift Package Manager: select file -> Add Packages…and enter the Glassfy GitHub URL: https://github.com/glassfy/ios-sdk.
Now we will add the initialization code in applicationDidFinishLaunchingWithOptions where you must initialize the SDK using the APIKEY you recover from Glassfy Dashboard
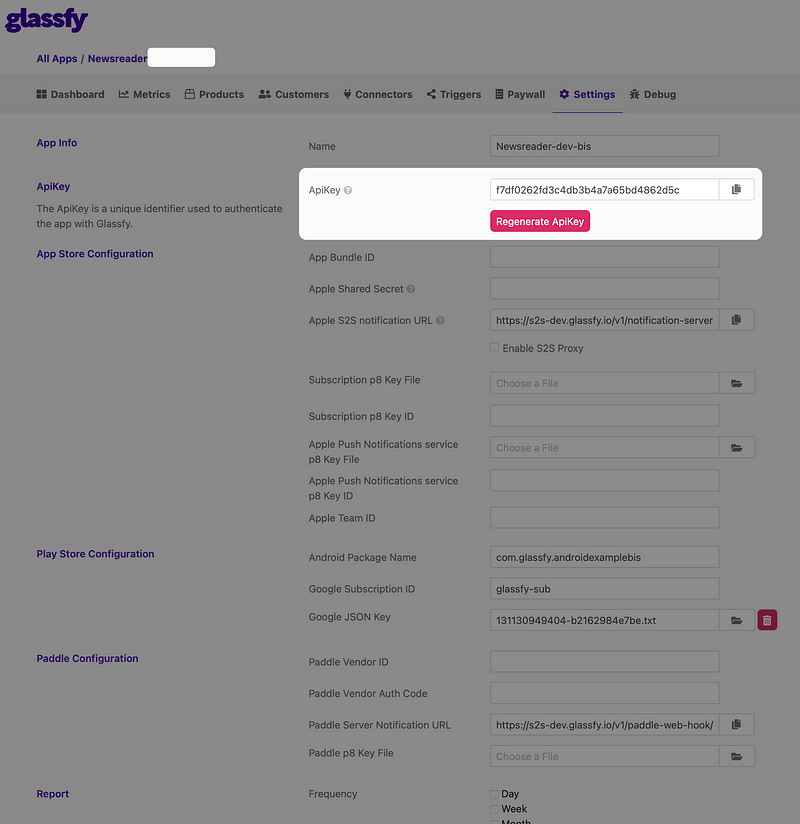
You can use the previusly created Offering list to build a paywall where the user can make a purchases without hardcoding the SKUs in the app.
The purchase will return an array of permissions that you can use to unlock premium features of your app.
You can check the status of your purchases using permissions in any section of you application by using the following code:
Now your app is ready to be tested: be sure you have accepted all contracts in App Store Connect and create a SandBox User Account and perform some test purchases that will appear immediately in Glassfy Dashboard.
NOW YOU ARE READY TO GO. Submit your app to the App Store and start monitoring your subscriptions metrics! Of course, you can do it easily with Glassfy.
Read More

